Git & GitHub Starters !

Feeling overwhelmed by Git and GitHub? Don’t worry, because it’s completely natural, especially when you’re just starting out. But guess what? You have opened just the right blog! This guide will walk you step-by-step through the setup process and essential commands, making the whole experience smooth and stress-free. By the end, you’ll feel confident managing your code, collaborating effortlessly, and taking your first big steps into the world of version control.
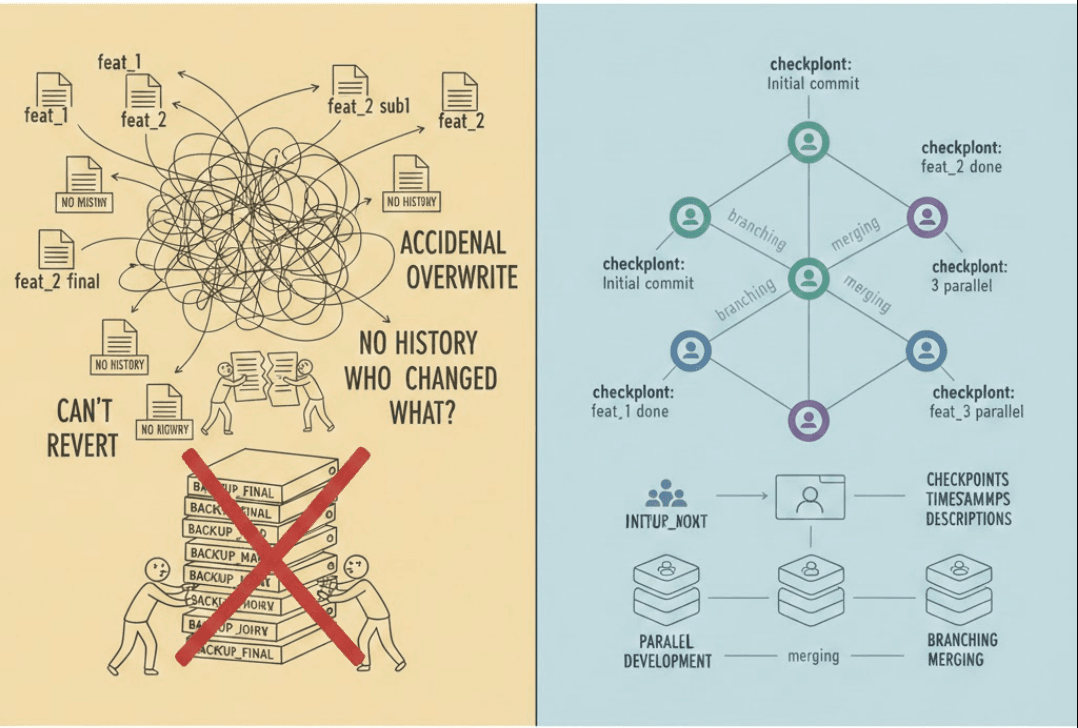
From Chaos to Clarity
Imagine this: You are the part of a team of coders, each working on a different task. One teammate is developing a shiny new feature, another is optimising an old one, someone else is debugging a tricky issue, and another is clearing out legacy code to make way for something better—all within the same codebase. Sounds chaotic, right?
This is exactly where version control (e.g. Git, Mercurial SCM, Fossil etc.) comes into the picture
Getting Started - Installing Git
To begin using Git, you'll need to install it on your local machine. Follow these instructions for your operating system:
On Linux
Open the terminal and type the following command based on your distribution:
For Ubuntu/Debian:
sudo apt-get ins/tall gitFor Fedora:
sudo dnf install git
On MacOs
- Open the Terminal and type
brew install git(requires Homebrew).
On Windows
Download the latest version from Git for Windows.
Run the installer and follow the prompts, accepting the default settings.
After you have successfully installed Git, you can verify it by running the command git --version, if you get a version number, you are ready to proceed!
Configure Git
Now that you have git installed in your system, it is time to configure it which could be done by following the below steps in git-bash:
   git config --global user.name "Your Name"
   git config --global user.email "your.email@example.com"
The above command sets up your identity which would be visible to other coders collaborating to the project, the
--globalkeyword sets up your name and email fixed for any project that you open up in your system.In case you want to have different name and email id associated with different projects while working on the same system, you need to navigate to the folder containing your Git repository and open git-bash there and run the following commands:
git config user.name "Your Local Name"
git config user.email "local.email@example.com"
You can check your configurations at global level by running:
git config --global --listIf you want to check your configurations locally in a project, that could be done by running
git config --list
Basic Git Commands
Once you have successfully configured your git, the next step is to get used to the commands which are most widely used while used git. These commands are the ones you would be using almost 90% of times in your development journey.
Initialise an empty repository
git initThe git init command tells git to now register a project with git, i.e. Git will be looking at the different changes that you make in it and would provide you different options related to it.
Check Status
git statusWhen working on a project, you often deal with multiple files at the same time. Some files may be newly created, some already tracked, others modified, and some even deleted. With so many possible combinations of file states, it’s important to know where your project currently stands in Git.The git status provides a summary of the current state of your repository at that point in time. It tells you:
which files are untracked
which files are modified
which files are staged for commit
which files are deleted
Adding files to the staging area
 git add <fileName 1> <fileName 2> #to add a particular file to the staging area
 git add . #to add all the files in one go to the staging area
The git addis the command that tells Git which changes you want to include in the next commit. Git does not automatically track every change you make. Instead, it uses an intermediate area called the staging area (or index). It can track new files, mark modified files to be committed, prepares a snapshor of your changes for the next commit.
Save your Changes
git commit -m "message"You use git commit when you have staged a logical set of changes and want to permanently record them in the repository. It takes the changes from the staging area and creates a snapshot in Git’s history, along with a commit message that explains why the change was made. Once committed, these changes become part of the project’s timeline and can be reviewed, reverted, or shared with others.
Check Logs
 git log #show complete commit history
 git log --oneline #display commits in one-line format
We aim to use git log when we want to inspect the commit history of a project. It does not change anything in your repository; instead, it shows a chronological list of commits, helping us understand how the code evolved over time, track when and why changes were introduced, and identify specific commits for debugging or review.
Basic Developer Workflow using Git (From Scratch)
In this section we would be discussing a life of developer from GIT’s pov:
You start a brand-new project called abc. Since you want all the changes that you make while developing this project to be tracked so that you can revert back or work in parallel with other developers, you decide to first initialize Git in the project.
git inti
Now Git has started monitoring your project.
You have seen other developers using git and have come to know about a convention where most developers seem to work around the main branch which represents the stable version of their code.
git checkout -b main
You are now on the main branch and ready to start development.
You create a few files and begin writing code. Before saving anything permanently, you want to check where you currently stand.
git status
Git shows you which files are new, which are modified, and which are not yet being tracked.
Once your initial code is ready, you decide to prepare it for saving. You add the relevant files to the staging area so Git knows they should be included in the next snapshot.
git add .
At this point, the changes are staged but not yet saved.
You are happy with the work so far and want to record this version of the project. You create a commit with a meaningful message.
git commit -m "Initial setup of abc project"
This commit becomes a permanent checkpoint in your project’s history.
As development continues, you want to see how your project has evolved over time. You check the commit history.
git log
Git displays all the commits made so far, helping you understand the timeline of changes.
Now it’s time to back up your work and share it with others. You push your local commits to a remote repository.
git push origin main
Your code is now safely stored on the remote repository.
Later, another developer makes changes to the same project. Before continuing your work, you pull the latest updates to stay in sync.
git pull origin main
This is how developers on a daily basis write code, check status, add changes, commit, review history, push, and pull.
Conclusion
Version Control system is a part of the development cycle and in this article, I have tried to explain the basic commands for git which could be used in day to day scenarios when working in the collaboration with the other developers on a project.
There is more to git, but this is the bare minimum which every developer should know. In further blogs we would be discussing more commands and strategies when working with git.